
This is part of a book I was asked to write in 2003-2004 about open source software. Unfortunately, the book didn't end up getting published. This particlar section is from a chpater on OpenOffice.org 1.1.0, which is now completely out of date. Nonetheless, there's still some good information here that might be helpful to someone, and I thought this section might be at least of historical interest.
On Windows, OOo will use the installed fonts and printers available to the system, just like every other Windows program. Linux users, however, have just a little bit of work to do in order to use their selected fonts and printers.
If your menus were set up correctly when you installed OOo, you should be able to go to the K menu, choose Office, & then select OpenOffice.org Printer Management. If you can't find the menu item, then open your terminal, and, assuming that you installed OOo where I recommended above, type the following command as a normal user:
$ .OpenOffice.org1.1/spadmin
At this point, you should see the following window:
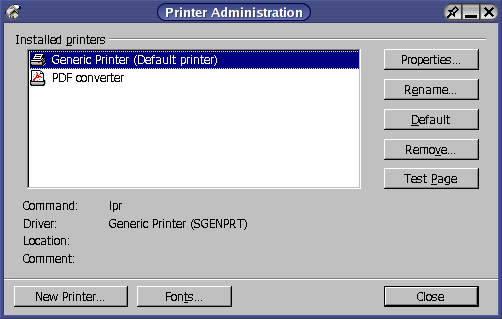
OpenOffice.org's Printer Administration window, which we will use to configure printers and fonts.
By default, OOo uses the default printer that lpr or CUPS uses, which is nice, but not all that useful. Let's make it a lot more useful by adding a new printer that will pass things along to kprinter, KDE's interface to its very well-designed print system.
For now, just notice that you have a PDF converter available as a printer. We'll get to that soon.
To begin, select the New Printer … button. Choose Add a printer and press Next >>. On the following "Choose a driver" screen, select Generic Printer and press Next >>. For the command line, enter a call to kprinter and press Next >>:
kprinter --stdin
As for a printer name, you can choose whatever you wish. Personally, I use "send to kprinter," but I'm boring sometimes. In addition, I make the new "send to kprinter" the default printer, and then press Finish. Now when you print in OOo, you'll see the kprinter window, which gives you a wealth of useful options:
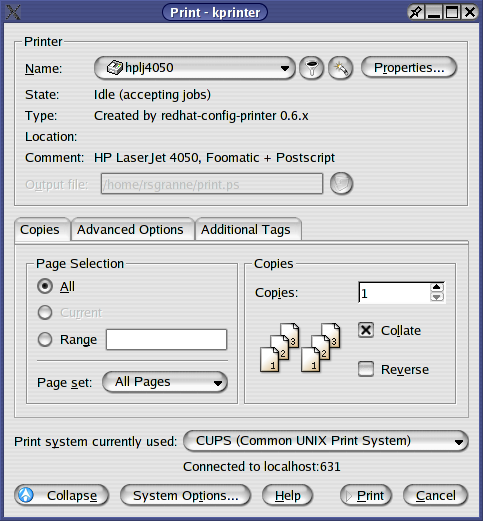
A better way to print in OpenOffice.org: kprinter.
If you don't want to use KDE's kprinter, you can of course choose a different printer on the "Choose a driver" screen: HP LaserJet 4, for instance. OOo allow you to have as many printers defined as you wish; however, one of the advantages of kprinter is that you can define your printers there. So I usually define printers using Red Hat's Printconf utility (or YAST if I'm using SUSE, or CUPS if I'm using Debian, and so on), which makes them show up in kprinter. Hey, I know it's a bit confusing. It's all part of the joy of using Linux!
Adding fonts to OpenOffice.org can be slightly complicated, but it's worth it to see documents in all their typographical glory.
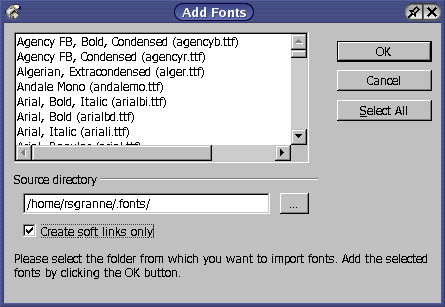
Now that we have printers taken care of, let's work on fonts. Back on the "Printer Administration" window, press the Fonts … button. In the resulting "Fonts" window, press Add …, and then you'll see the "Add Fonts" window:
If you created the ".fonts" subdirectory in your home directory, as I recommended back in chapter one, then this is going to be easy. Press the … button in the "Source directory" section, and then navigate to/home/[username]. In the "Path" textbox, type ".fonts" after/home/[username]and then press Select. Back on the "Add Fonts" screen, check the box next to "Create soft links only" (that way you'll create links for all the fonts; otherwise, you will actually copy the fonts into OOo's fonts directory, which is a needless waste of space), press Select All, and then press OK. Press Close to get rid of the Printer Administration window, and you're all set.
Now when you're using OOo, all of your favorite fonts will be available to you. Life is good.