
This is part of a book I was asked to write in 2003-2004 about open source software. Unfortunately, the book didn't end up getting published. This particlar section is from a chpater on OpenOffice.org 1.1.0, which is now completely out of date. Nonetheless, there's still some good information here that might be helpful to someone, and I thought this section might be at least of historical interest.
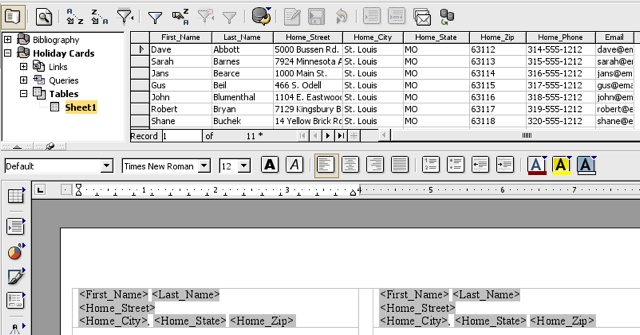
My wife and I have a pretty large list of folks to whom we send out holiday cards. In order to make it easy for us both to edit the list every time someone changes an address, we store it in an spreadsheet, created using OOo Calc and named "holiday_address_book.sxc". So let's say that our list looked something like this:
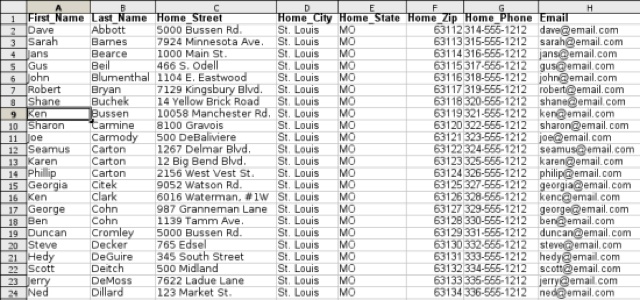
A pretend list of holiday card recipients, in OpenOffice.org's Calc spreadsheet.
Now, after Denise and I have spent a lot of time writing our annual holiday letter, printing it out, and sticking copies of it into envelopes, we still have a major job: mailing labels. How do we turn our spreadsheet into mailing labels?
To start the process, we need to create a new "data source," which tells OOo how to connect to a particular database. To create a new database connection, select the Tools menu and then Data Sources … to open the Data Source Administration window.
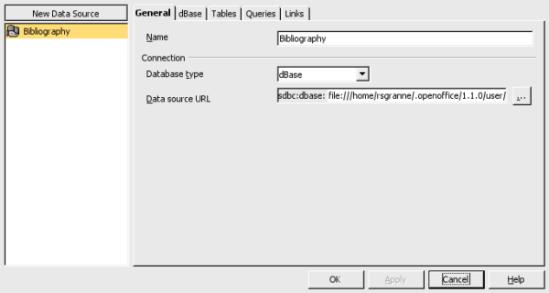
Create a new data source in OpenOffice.org.
OOo can create data sources for a variety of database types, including MySQL, Adabas, ODBC, dBase, text, spreadsheet, and even a Mozilla or LDAP address book. In our case, we're going to create a data source that's going to link to our spreadsheet of names and addresses.
Press the New Data Source button at the top left of the window. Instantly, a data source named "Data source 1" is created. Let's change the Name from "Data source 1" to "Holiday Cards," and change the Database type from "JDBC" to "spreadsheet." Now we need to point the Data source URL to our spreadsheet. By default, it says "sdbc: calc:," which you do not want to remove. Instead, we want to add onto that base, and the easiest way to do that is to click on the button to the right labeled "…". When you click on that button, a new window opens up; in that window we navigate to the spreadsheet file named "holiday_address_book.sxc" and click on the Open button. Now the Data source URL says "sdbc: calc: file:///home/rsgranne/mydata/holiday_address_book.sxc," the correct path to our file of friends.
We're using the entire first sheet in our spreadsheet as our data source, so we need to start the data in that sheet in cell A1, and we need to make sure that the first row consists of the column headings, like "First_Name," "Last_Name," "Home_City," and so on. Finally, because we're using a spreadsheet, the data we're going to be working with is read-only; other data sources allow changes to the data while in Data Source Administration.
Now that we have our data source set up, press OK to close the Data Source Administration window. Let's take the data we just defined and turn it into labels.
Select the File menu, then New, and finally Labels.
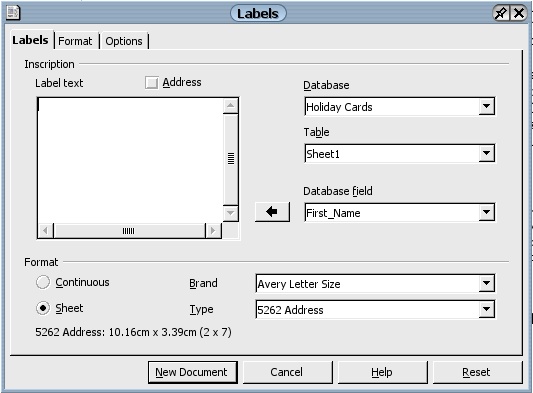
Creating the template for labels in OpenOffice.org.
This window is where you're going to do a lot of your work. First, choose the Database you're going to use. In my case, I choose Holiday Cards, the data source I defined previously. Once the database is chosen, any tables in that database appear under Table; I select Sheet1, my only choice. Once the table is chosen, the columns I used as headers in my spreadsheet appear as options under Database field.
Since this is a mailing label, I only care about certain of the choices in Database field: First_Name, Last_Name, Home_Street, Home_City, Home_State, and Home_Zip. However, I need to position those choices in the Label text box. To do so, I select First_Name and then click the arrow button to the left of Database field. This places First_Name into Label text, but the field is expanded to its full name: . At this point, I enter a space, since I want a space between the first and last names, and then select Last_Name in Database field, press the arrow button, and add .
Now I hit Enter in order to start a new line for the street. In Database field I choose Home_Street and press the arrow button. Once again, I hit Enter to start the last line of the address label and then, in quick succession, enter the last options in the Database field into the Label text box. However, I place a comma after Home_City, and a space after Home_State, so the last line in Label text looks like this:
<Holiday Cards.Sheet1.0.Home_City>, <Holiday Cards.Sheet1.0.Home_State> <Holiday Cards.Sheet1.0.Home_Zip>
Before continuing, there's one key bit of information you need to enter on this tab: the type of mailing label you're using. First, indicate whether you're printing onto a Continuous roll of labels or individual Sheet(s). Choose yourBrand from the list of choices available to you; in my case, I want Avery Letter Size. Once you've picked the Brand, choose the specific Type. From the very long list of Avery labels, I select 5262 Address.
We're done with the Labels window and the labels setup. Click the New Document button, and a few seconds later, a new document opens, titled something like "Labels," looking something like this:
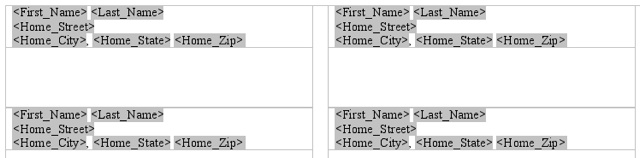
A new document opens, with the fields for the mailing labels clearly delineated.
Our labels contain fields, but no data. In order to add data, we need to select which records we'd like to use from our data source. To view our data, go to the View menu and select Data Sources, or press F4 on your keyboard. A new section will appear at the top of your OOo window, so that you should now see something like this:
View the data source for our new labels.
It's now time to select the records you want to use to create labels. The easiest thing to do is just select all of the records (after all, this is the holiday card list, and we want to send holiday cards to everyone on the list!). To select everything, just click the topmost, leftmost box, the one to the left of First_Name in Illustration 27.
If, however, you only want to select certain of the records, you can do so by either using the Shift key for contiguous selections, or the Control key for non-contiguous selections, and clicking on the boxes to the left of the records.
Once you've made your selections, it's time to press the Data to Fields button. This button is inactive, or "grayed out," until you've selected records. Now, however, the button is available to be clicked. Data to Fields is the third button from the right on the Database toolbar.
Presto! As soon as you press the Data to Fields button, OOo inserts your data from your spreadsheet into the labels. They're now ready to print, or save if you plan to use them again.